Connecting Your WooCommerce Store
Connecting your WooCommerce store is the first step after creating your account. Fulfiro needs read and write access to your WooCommerce REST API to sync products, orders, and stock levels.
Method 1: One-Click OAuth (Recommended)
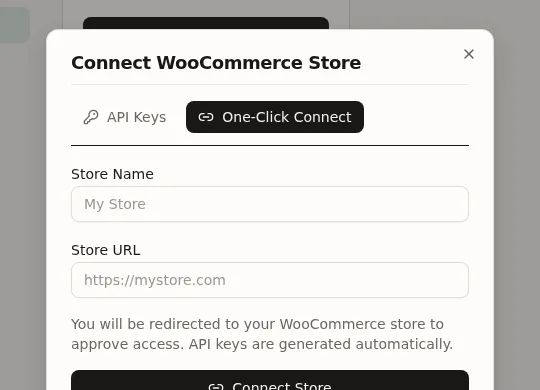
- Go to Settings > Stores and click Add Store.
- Switch to the One-Click Connect tab.
- Enter a friendly name for your store (e.g., "My Main Store") and your store URL (e.g.,
https://mystore.com). - Click Connect Store. You will be redirected to your WooCommerce admin.
- In WooCommerce, review the permissions and click Approve.
- You will be redirected back to Fulfiro with a success message.
- Fulfiro automatically begins importing your products. See Your First Sync.
Method 2: Manual API Keys
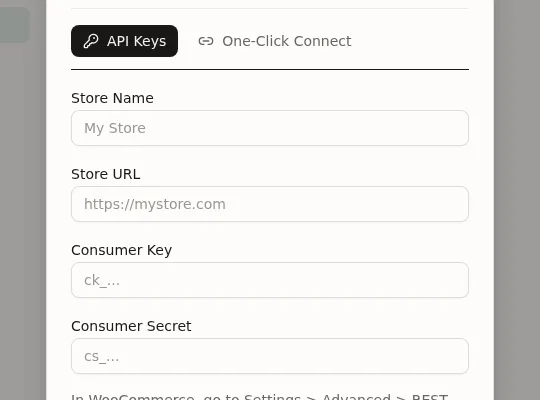
If OAuth does not work (some hosting environments block it), you can enter API keys manually:
- In your WooCommerce admin, go to WooCommerce > Settings > Advanced > REST API.
- Click Add Key. Set the description to "Fulfiro", the user to your admin account, and permissions to Read/Write.
- Click Generate API Key and copy the Consumer Key and Consumer Secret.
- Back in Fulfiro, click Add Store, switch to the API Keys tab, and enter your store name, URL, Consumer Key, and Consumer Secret.
- Click Connect.
What happens after connection
- Fulfiro fetches all your products, variations, and stock levels
- Webhooks are registered on your WooCommerce store for real-time sync (orders arrive from this point forward -- historical orders are not backfilled)
- Custom WooCommerce order statuses are auto-detected and added to your status map
Requirements
- WooCommerce with REST API v3 support (WooCommerce 3.5+, though we recommend running a recent version)
- WordPress REST API must be accessible (not blocked by security plugins)
- Pretty permalinks must be enabled (WooCommerce REST API requirement)
- HTTPS is required for OAuth
Having trouble? See Sync Not Working or Webhooks Not Firing.